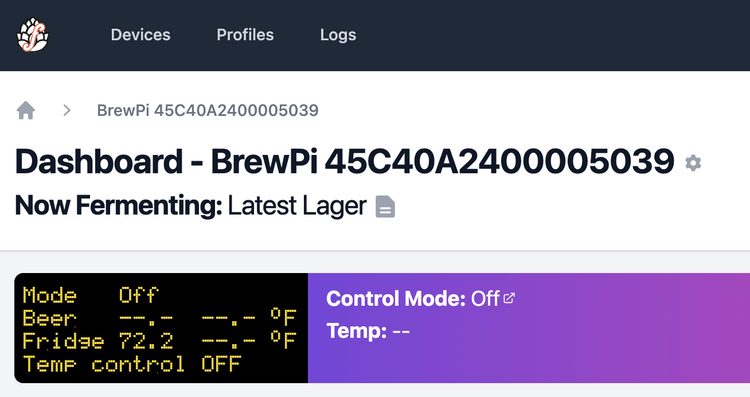
Installing Fermentrack in Proxmox (Virtual Machine)
Although Fermentrack was originally designed to be run on a Raspberry Pi, both for testing and in production in my brewery I run everything in an Ubuntu virtual machine running on Proxmox. Proxmox is a virtualization management platform that allows users to create and manage virtual machines (VMs) and containers. Virtual machines (and containers!) allow a single physical server to act as if it was multiple servers at once, thereby enabling the installation of apps like Fermentrack in their own, separate, secure environment.
Selecting Hardware
With the Raspberry Pi, the only hardware choice that needed to be made was between the RPi 3 and the RPi 4. Proxmox, however, can run on most mainstream Intel or AMD processors which opens up a world of possibilities - often cheaper than Pis are going for these days.
At home, I run my virtual machines on a Dell Optiplex 7050 with an i5-6500T processor. These are the super tiny "thin client" desktops that have become commonplace in corporate settings – which means that they have also become readily available on eBay as companies sell off old stock. For $100 you can help "solve" the eWaste problem while getting a much faster computer than an RPi 4 for less than they're going for on the secondary market.
Installing Proxmox
With the hardware purchased, the next step in a Proxmox + Fermentrack build is installing Proxmox. I will not pretend to be able to write better documentation than Proxmox project – my recommendation is to hop over to their site and read what they've written. Once Proxmox is installed, come back here to continue.
Setting up your VM
With Proxmox installed on your hardware ("bare metal") you are now ready to set up a virtual machine to host Fermentrack. With Proxmox there are two options for hosts - LXC (Containers) and VMs - this article will install Fermentrack into a virtual machine. Installation into an LXC may work, but it effectively becomes "docker in docker" which is a more advanced setup than this tutorial will cover.
Download Ubuntu Server's ISO
Before you can create an Ubuntu VM to host Fermentrack, you will need to download the ISO necessary to install the OS. Proxmox does not include any OS ISOs by default, so this is a required step.
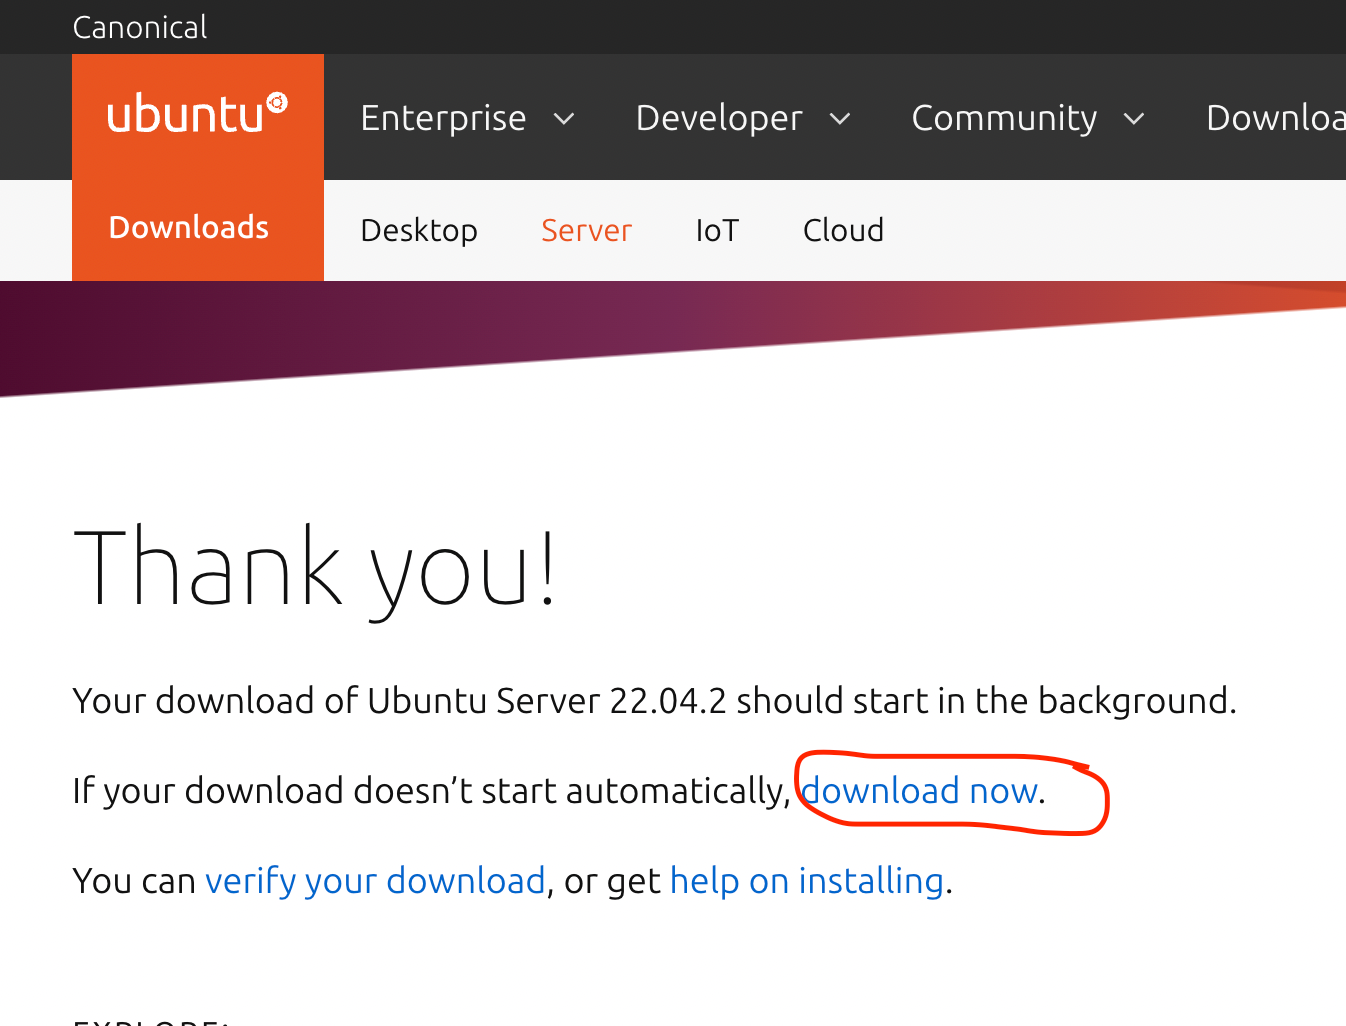
First, head over to the Ubuntu website, click "Downloads", then "Server", and then click the "Download Ubuntu Server" button. Right now the current version is 22.04.2 LTS – this may have been updated by the time that you are reading this article. This will take you to a page that will start downloading the ISO to your desktop. You can cancel this download – what you need is the URL of the download available on this page. Right click on the "download now" link and choose "Copy Link Address" or the equivalent for your web browser:
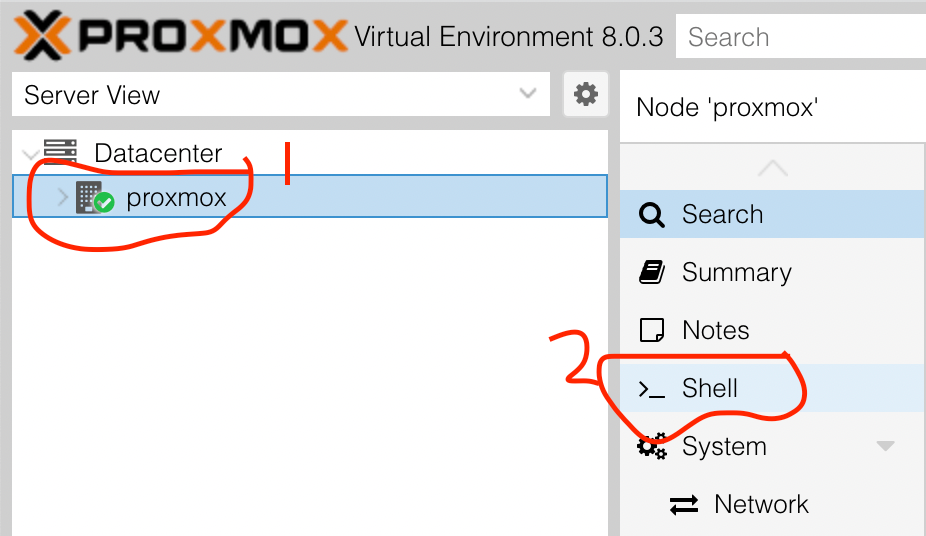
Next, you will download the ISO at this link to the correct directory on your Proxmox server. Log into your Proxmox server's web interface (typically, this will be at http://xx.xx.xx.xx:8006/, where xx is replaced with the IP address of your Proxmox server), select the server in the left sidebar, and then click "Shell" to bring up a shell interface:
Once the shell is available, run the following two commands:
-
cd /var/lib/vz/template/iso wget <paste the URL you copied earlier>
(so in my case, wget https://releases.ubuntu.com/22.04.2/ubuntu-22.04.2-live-server-amd64.iso)
This will take a minute or two, but the ISO to install Ubuntu will download to the appropriate folder in Proxmox. You are now ready to set up the VM and install Ubuntu.
Create the VM
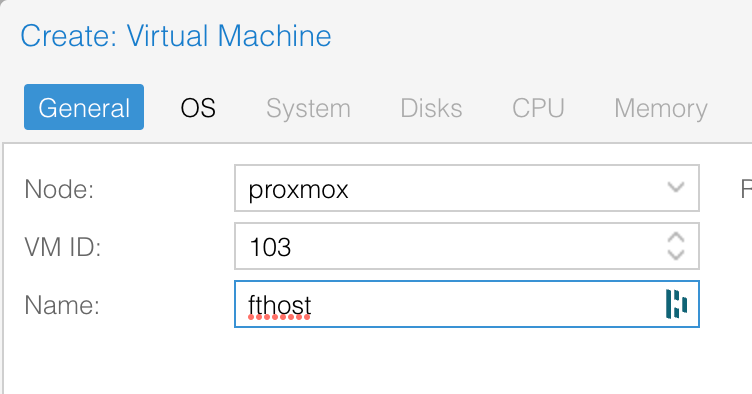
Once the ISO has finished downloading, in the Proxmox Web UI, click the "Create VM" button in the upper right:

The node and VM ID should auto populate - for "name" choose a hostname that will remind you of the purpose of this VM:
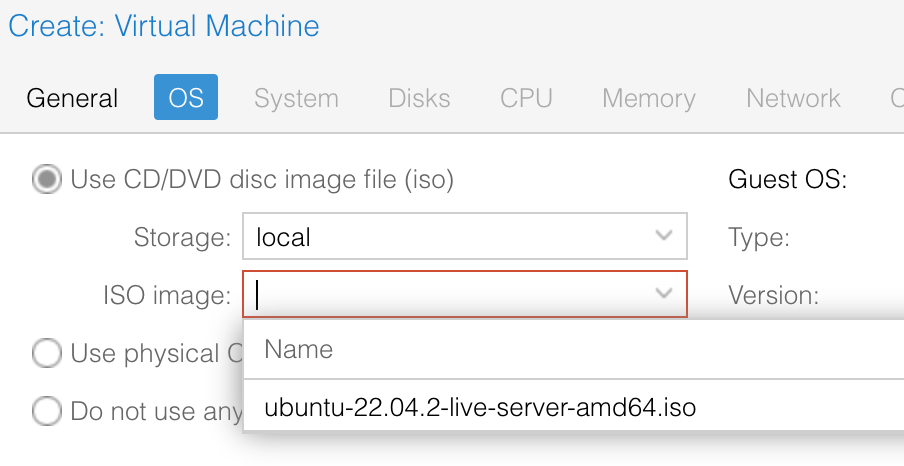
Click "next" and you will be asked to select the ISO to use for installation. Choose the ISO you just downloaded:
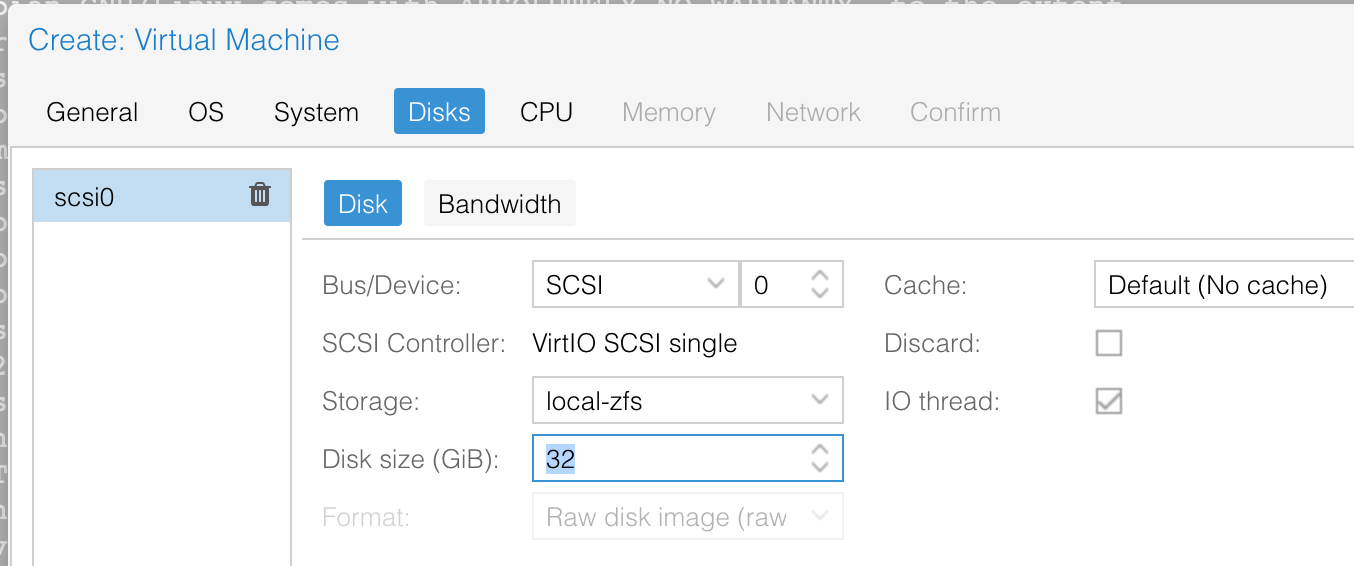
Click "next" to go to the "System" tab. Leave the defaults, and click "next" again to go to the "Disks" tab. For the disk size, you will probably want somethign at least 32 GB. Update that if necessary, but leave the other defaults alone:
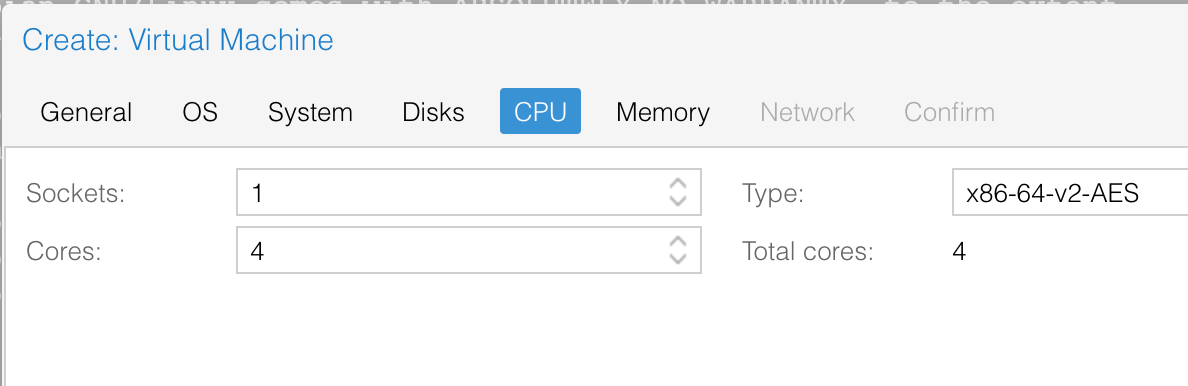
Click "next" to go to the "CPU" tab. This tab is largely a matter of personal choice (limited by your hardware) – I typically choose one socket and four cores:
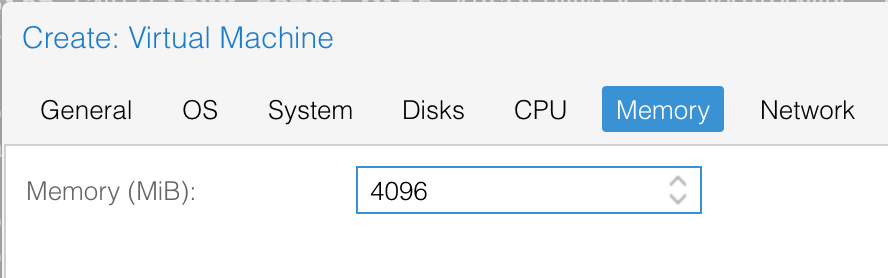
Click "next" to go to the "Memory" tab. Fermentrack works best with at least 2048 MB of RAM, but can benefit from more (and run with less). My recommendation is to use 4096 MB of RAM if you have it available:
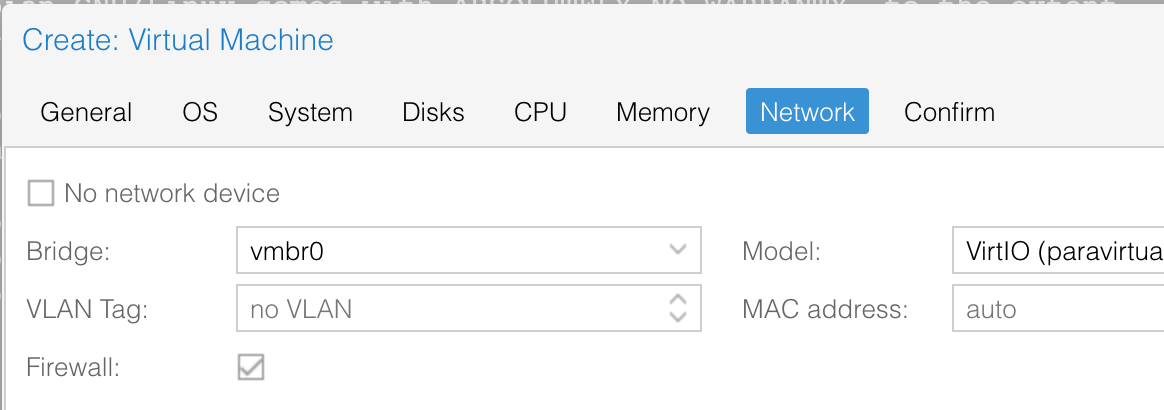
Click "next" to go to the "Network" tab. Your network settings are largely determined by your local network setup, but in most cases the defaults are sufficient:
Click "next" to go to the "Confirm" page, and then click "Finish" to create your VM. Your VM should now appear in the left sidebar.
Install Ubuntu on the VM
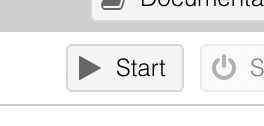
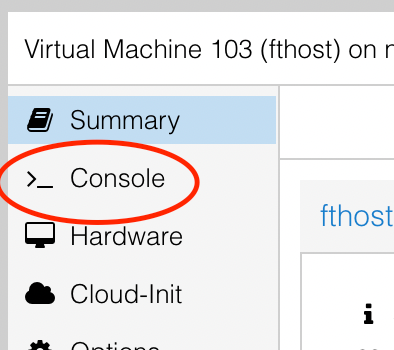
Select the VM you just created from the left sidebar, click the "Start" button in the upper right, then click "Console" in the middle-sidebar:

This starts the VM, and should launch the Ubuntu installer. If prompted, choose "Try or Install Ubuntu Server" which - after a few moments - will prompt you to select a language to install. I will not cover every step of the install here, but the prompts are generally pretty straightforward (and the defaults suffice in most cases). At some point you will be asked if you are sure you want to delete everything on the disk – you are deleting everything on the the virtual disk you created above - your Proxmox install is safe.
When prompted to enter your name, server name, password, etc. enter values that you can remember. I typically choose the same "server name" as the VM name I chose above (e.g. "fthost") but this is a matter of personal preference.
When asked about OpenSSH - I recommend you install it. Although you can access your VM's shell via Proxmox (as you are now) SSH makes this much easier.
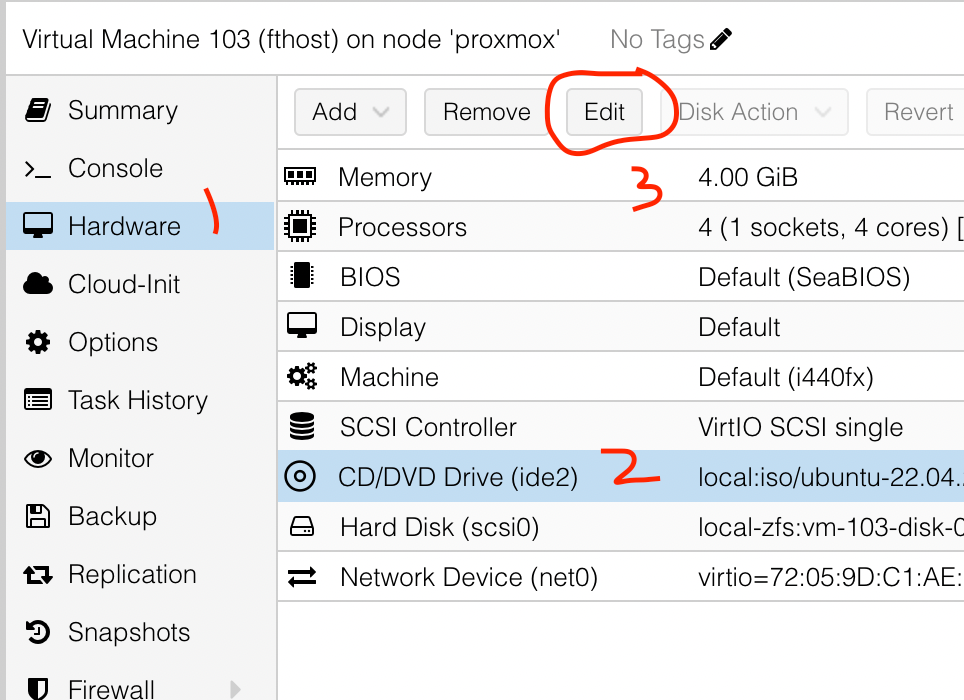
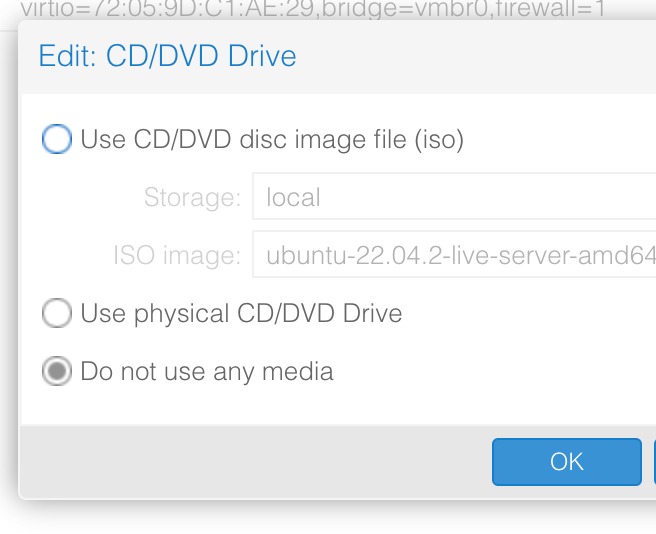
Let the installation complete, and then choose "Reboot Now". You will likely get an error message about unmounting the CD-ROM – To resolve this, click "hardware" in the middle sidebar, select the CD-ROM drive, and click the "Edit" button:
Choose "Do not use any media" in the box that pops up, and click "OK":
This will disconnect the virtual CD-ROM drive. Return to the Console (above "Hardware"), and hit enter. The VM will reboot and should - after a few minutes - land at a login screen. For the first boot you may get a bunch of additional text that clouds the screen, but if you hit enter without typing anything you should get a login prompt:

Congratulations – you now have an Ubuntu VM ready for use with Fermentrack! Log in with the username/password you created during install and you're ready for the next step.
Installing Fermentrack
The last step is the easiest – installing Fermentrack! At this point you have created the VM and prepared it to host Fermentrack – the last step is the same as it is for all Raspberry Pi-based builds. From the command line simply run sudo apt-get update followed by curl -L install.fermentrack.com | bash
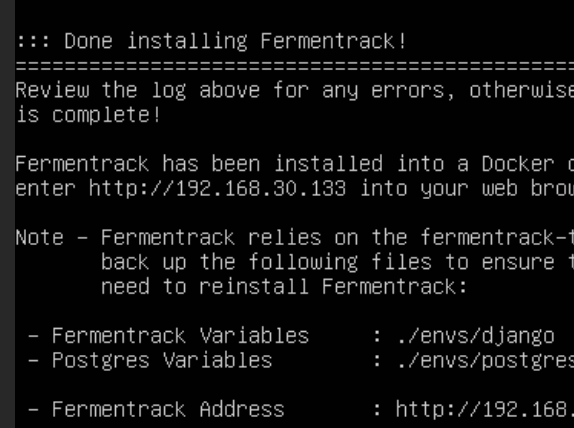
With that, you're done! Enjoy your new installation of Fermentrack running from inside Proxmox!